|
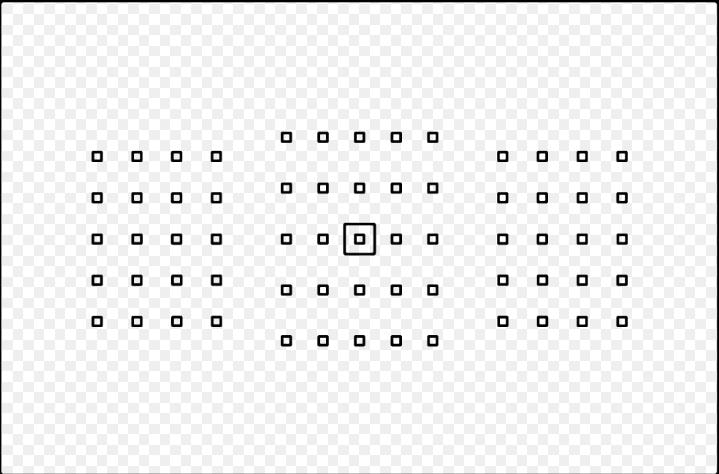
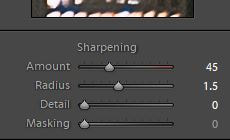
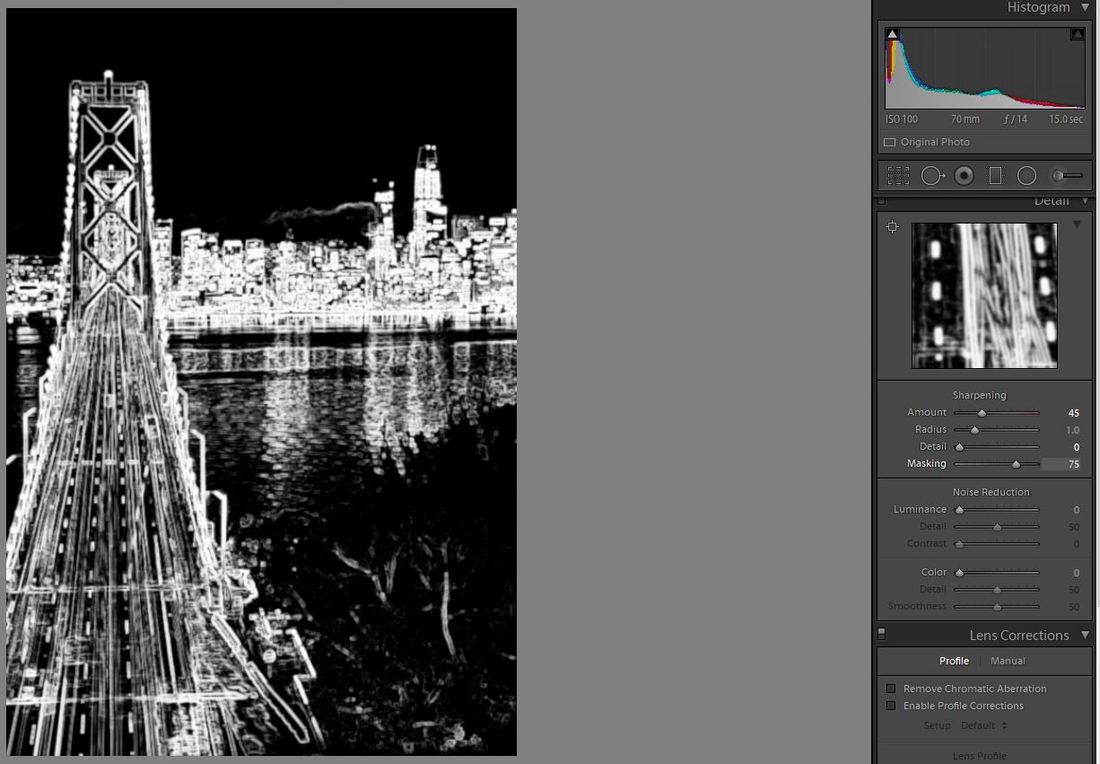
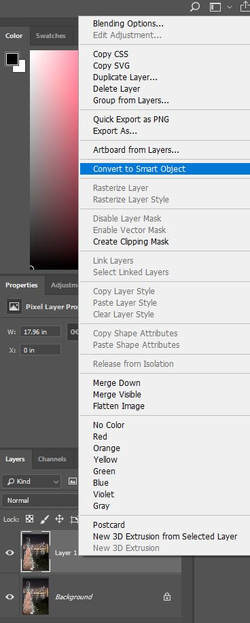
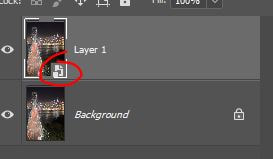
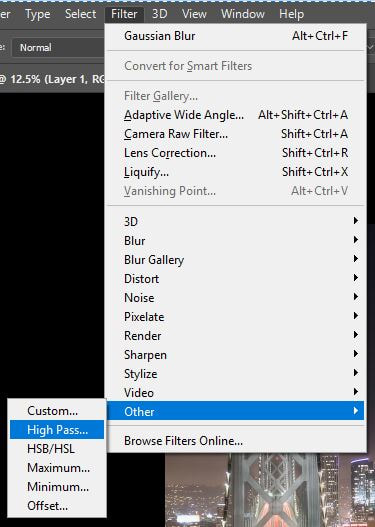
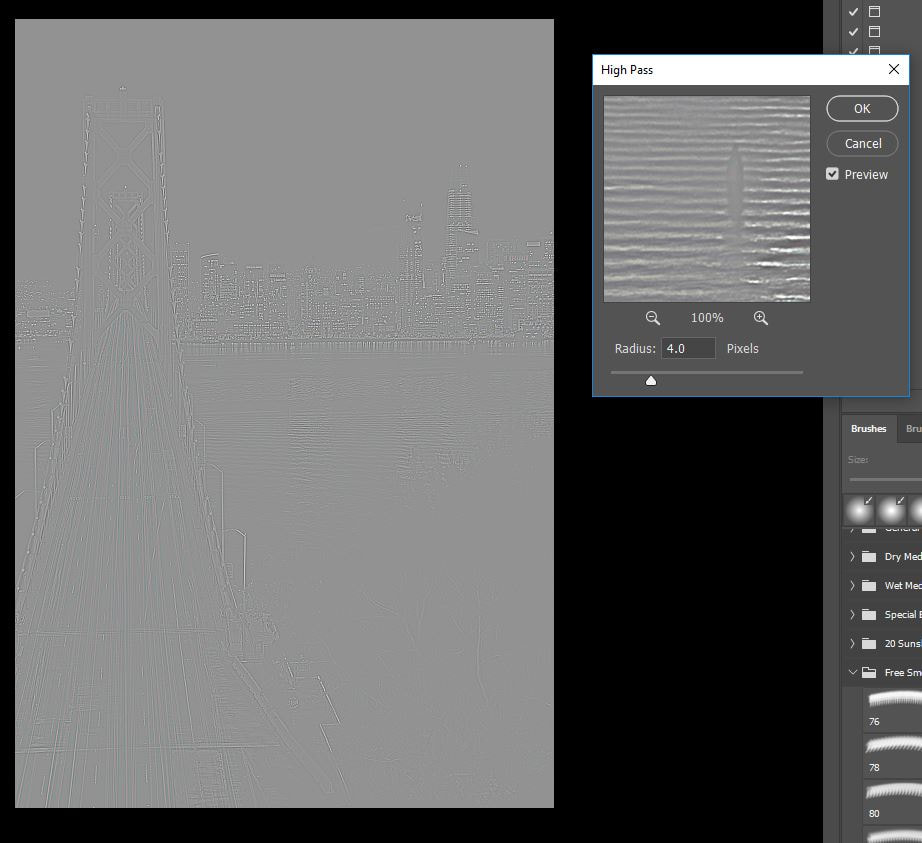
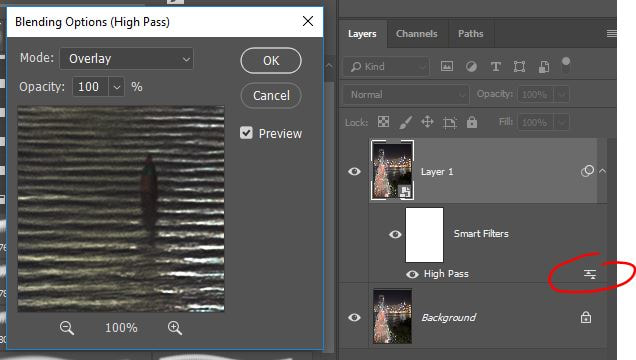
If you are here, you are likely on a similar journey that I am, constantly researching techniques to step-up your image quality to become a more well-rounded photographer. One of the biggest hurdles I initially struggled with understanding was the process of achieving tack sharp images. In the last year since I started my creative journey, I’ve learned quite a bit about all of the different factors that can affect your final image’s sharpness; quality of glass, aperture value in tandem with shutter speed, focus-points, as well as various post-process techniques which we will touch on. This article is purely based on my semi-professional knowledge so please leave your thoughts on my techniques in the comments here or on Instagram @wayfaring.professional - Let’s jump in. In-CameraAchieving an ultra-sharp image starts with the camera at your fingertips. I hear over and over again that gear does not matter, and that is mostly true. The exception to the rule in my opinion is the glass that you are using. This doesn’t mean you have to run out and spend $2,000 on new lenses, but you definitely want to do your homework on your glass selections. There are lenses in all price ranges that have developed a reputation for amazing value for the quality they deliver. As a Canon shooter, the Canon 50mm 1.8 STM is a great example at around $100 which never failed to nail the focus back when I was using one. There is one characteristic of this specific lens that lends itself to the amazing quality that it is able to produce at its cost; it is what is referred to a “prime” lens. Primes are lenses that are locked to a specific focal length – in this case 50mm. Since the lens only has to worry about one perspective the construction is much simpler and light has to travel through less glass elements than a standard zoom lens in order to achieve greater image quality. This is why higher-end lenses are so expensive; most of them boast similar image quality to their simpler prime counterparts at a wider range of perspectives and at wider constant aperture values (think back to our Know Your Camera articles). Hopefully this gets you thinking about the quality of glass you are utilizing and perhaps to invest in a prime at your favorite focal length to experiment with! Assuming you have your lens situation all squared away, the next technique I want you to “focus” on is manually selecting your camera’s auto-focus (AF) options. Unless I am taking a photo of a landscape or cityscape, I will typically be composing my pictures using Servo AF combined with a manually selected AF point vs your standard one-shot AF and unreliable entire-frame-autofocus (research your camera manual on these settings). Servo basically comes in handy for photographing movement and especially covering an event where things are moving quickly and unpredictably as the AF motor is constantly re-focusing as long as you are holding your focus button down in order to give you a higher chance of nailing focus - One-shot AF will lock on once and you will need to re-focus if your subject moves even an inch. Many of the new cameras do a lot of the heavy lifting for you *cough* SONY *cough* but practicing with manual points in my opinion allows you to slow down and think about other important aspects of what makes a great image (composition, framing, SHARPNESS). I would say if you nail a one-shot AF shot the maximum sharpness potential is greater, but starting out, Servo is the way to go. Your camera will offer a different number of focus points depending on your gear but using referencing the example above there are a huge number of points available. When you use the default auto-focus feature on your camera you might notice a bunch of seemingly random squares flash quickly before your shutter clicks, however sometimes your camera may frustratingly focus on the wrong thing or exactly what you want in focus may come out a little blurry. As mentioned before, by selecting your focus point/range manually you will eliminate some of the frustration and start to really master your camera. In future articles we can tackle this topic in more depth. In Post-ProcessLightroom: There are a couple key techniques that I utilize to artificially enhance image sharpness in both Lightroom and Photoshop. Lets go over the sharpening panel in Lightroom first - it took me a lot longer than it should have to understand this panel so hope this helps! Amount - Basically does exactly what it means. Think about each individual pixel in the photo and the contrast between each increasing as you slide the slider to the right. The effect is mostly imperceptible at first glance but if you look at the zoom preview box the difference is significant. Radius - This bar expands the area of effect around each pixel and generally defaults to 1.0 or one pixel of sharpening offset. I tend to leave this at 1.0 to avoid ghosting from pixels being enlarged where they shouldn't be. Detail - This is another slider that I would recommend for what I know best - urban photos benefit the most where there are super detailed textures like gravel or pavement. The software basically reads groups of pixels that look like they are similarly connected and focuses on emphasizing those areas. This is also known as high pass sharpening which is also achievable in Photoshop and which we will cover in a minute. Masking - This is the most important of these sliders in my opinion. When left at zero, each of the sliders above affects each pixel individually. I'm going to let you in on a little SECRET; if you hold Alt+move the slider to the right you'll see the edit area turn grey. As you move the slider to the right you will notice the screen turning blotchy in a rough outline of your image. What is happening is the sharpening is being emphasized on the white parts of the image which is a game changer if you are editing an image with lots of lines and fine details like my cityscape example below. Photoshop: My favorite technique to use is the high-pass filter technique in Photoshop to apply a subtle sharpening touch to my urban photos. To accomplish this, open your image in Photoshop and make a copy of your background layer in the layers panel using Ctrl(Cmd)+J, then: 1. Right-click on your copied layer and hit "Convert to smart object". Photoshop will pause for a second and there should now be a little paper icon in the image preview. 2. Go to your Filter drop-down and select Other>High Pass and your working image should turn grey with a faint outline of your image showing. This basically is filtering out all the data in your image except for the textures that the software determines is a standalone edge or highlight. You want to pick a pixel value that reveals the outline against the gray slightly, keeping in mind that more is not necessarily better. 3. Blend the sharpened texture into your image by double-clicking on the little slider icon that has appeared in you layers panel under your new smart filter. I personally utilize "Overlay" in the drop-down a majority of the time but play around with the other settings to see which impacts your image to your satisfaction. Play around with these techniques as each image requires a different balance of editing to really make pop! Hope this article helps you take your imagery to the next level! -Alex Wayfaring Professional |
Categories
All
|



 RSS Feed