|
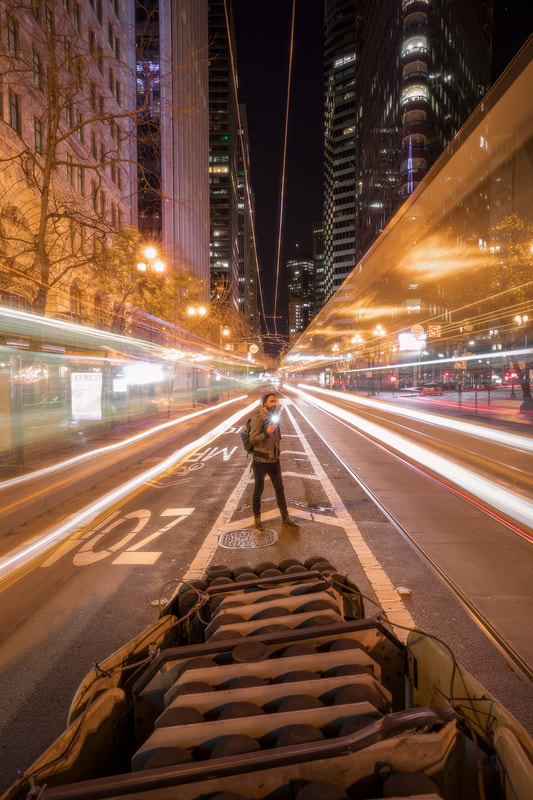
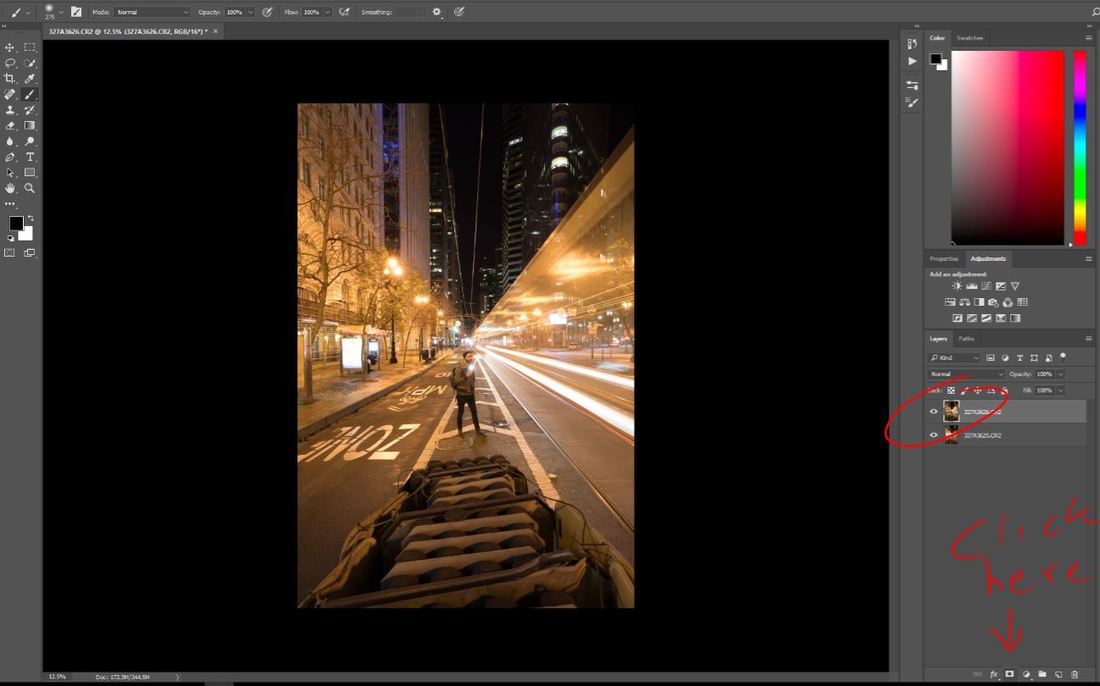
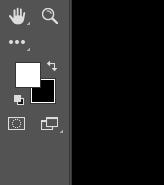
First of all: I’m stunned by the response from my Instagram story requesting I write articles to help others improve their craft and am incredibly flattered that my work has reached a point where others look to it for inspiration. Whether it is getting to know their camera better, to maximizing their travel opportunities, or to learning how to edit their photos for the greatest impact (all of which are in the pipeline so consider this the beginning of our journey) – I am excited to start on this new adventure of teaching you all the tips and tricks that I have picked up over my relatively short time as a budding content creator to help you achieve your photography goals! I plan on sharing basic editing tips and my knowledge of the camera to help you achieve your photography goals and we have so much to explore. What I write may not always be the best technique but my intent is to facilitate discussion around producing better images – I’m keen to hear from some more proficient editors about how they might go about a process more efficiently or add additional detail in their post-process via direct message on Instagram @wayfaring.professional, email, or in the comments below! The Importance of Editing: One of the most important aspects of creating impactful images is, in my opinion, the post-process result itself. Despite this fact, most beginners despise spending more time than they need to in their editing software or investing in the tools that they need to really start bringing their images to life. In the digital age, editing software has become incredibly accessible (and more affordable than you think) and there are unlimited resources out there to gain inspiration from and to try out within them. I personally use Adobe Lightroom CC and Photoshop in my workflow as it serves as a one stop shop for cataloging my images, editing on my desktop, and editing on the go via the mobile app. The mobile function is super important to me as it gives me the freedom to utilize precious time commuting via public transit to my day job editing! Admittedly, I spend just as much time at my computer or on my phone tweaking and editing images as I do running around taking photos (and everyone that knows me know how much time I spend out and about or traveling abroad to take photos!!). Hopefully this motivates you to start taking editing seriously! That said, one of the easiest Photoshop techniques to learn in order to start you on the right path is called the Layer Mask function – Let’s jump in. We are going to use my light trail image as the example in this article. I have included the raw files for the three images I used in order to create the following final image for you to use and practice with! What we will be creating: Layer masking is the basic technique used to mask (hide) certain part of an image or blend two separate images together to create one cohesive image. The below example is a simplified example of what can be achieved when you master the art of taking images with the intent of masking certain pieces out (in this case, a stool). Image credit: @christopher.james As you can tell from the example images above, this technique ideally requires at least two identically composed images – meaning images taken from the same exact position with a tripod. Having matching images allows for seamless removal of objects from images. You absolutely do not need perfectly aligned photos but your job will be much easier if your environment remains the same in your files. My sample images are very well aligned so you will not need to worry about realigning the images. Step 1) Import your images to separate layers: Once you have imported the samples you have downloaded into your Lightroom catalog, highlight the sample images, right click on the selection and in the drop-down navigate to > "edit in" > "open as layers in Photoshop". Your desktop Photoshop application should automatically boot up and open a new project with each of the images in separate layers in the layer toolbar located at the bottom right hand corner of your screen. The layers tab can be confusing to those that are new to Photoshop – basically each layer overlays over one another in the order that they appear in the tab from top to bottom. Think of each layer as a sheet of paper laid down flat on top of the other with the first image being the one on top of the stack in the layers tab. A general tip is also to make a copy of the underlying layer (Ctrl/Command +J) before you make any destructive changes to an image; always keep a backup of the original file on the bottom layer to revert back to in case you make a mistake. There have been many times I have made it an hour into an edit and had to start over because a change I made was irreversible so make a habit of doing this!! For reference, here is how I had my layers laid out: The top layer is the image shown in the working area. Step 2) Create a layer mask: Now that our images are imported and we have a basic understanding of layer logic we need to begin the process of blending the images together. We achieve this by creating a layer mask – think of this as drilling a tunnel through a layer to reveal detail underneath on separate layers. Start by making sure the top layer is selected then click the layer mask button; a white icon will appear next to the image selected. This little white page should appear linked to your selected layer: Step 3) Brush and reveal: You’ll notice that there are two color icons on the left column with black on top and white right under it. This represents the foreground default (white) and the background default (black). Remember how our layer mask is completely white? We will be brushing in "black ink" over the white mask in order to make the underlying layer visible. Think about this process as painting the background onto the foreground or as erasing the foreground to reveal the background. This is a very significant concept and is important to understand if you want to up your Photoshop editing game. Select your brush (Ctrl/Command + B). In the brush settings tabs you can play around with the weight, feathering, opacity, and size of the brush. For now, keep your opacity at 100%. Now make sure the black color tab is selected as your foreground brush color. You can flip flop the white and black swatches by hitting the little 90 degree arrows by the icon. Then make sure the layer mask is selected you are set to start experimenting with the effect by brushing on the image. You’ll notice that as you brush the underlying image starts to become unveiled and your movements begin to appear as black ink in the white layer mask icon. The below example has the left portion of the image masked slightly, for example. Now paint over the part of the top layer where there are no trails but you know there are trails in the underlying layer and watch as the image begins to form. Lightroom and Photoshop provide a wide array of tools for creators, whether hobbyist or professional, to step their images up to another level. I am constantly exploring these tools and teaching myself new tricks - if you enjoyed this article let me know directly on Instagram @wayfaring.professional, in the comments below, or via email at [email protected] – I plan on writing more articles to help my peers grow and am open to suggestions for my next topic!
Until the next one, have fun experimenting with layer masking and please do share your results with me to see!! Alex Wayfaring Professional |
Categories
All
|



 RSS Feed